Preparing JRR Tolkien’s drawings for display
Marina V. Casagrande
MA Conservation of Fine Art Student
Northumbria University
The options to secure works of art on paper into a mount are diverse. They include straps, hinges, tabs and polyester windows to name a few. Mounting corners are also frequently used and are a very efficient choice.
During a summer placement at the Bodleian Libraries, I mounted and framed some pieces of the JRR Tolkien collection in preparation for their display. The collection contains items in various shapes. Thus, different techniques were adopted to mount them.
Items with irregular edges were mounted with T-hinges and V-hinges using Hasegawa Usumino Japanese paper, 1.6 monme, and wheat starch paste. The thickness and strength of the Japanese paper were carefully examined, it should be strong enough to hold the artwork but not so thick as to emboss/mark the item. Bifolia or heavier items were mounted with polyester strips. Double-sided works were secured to double-sided window mounts either in a floating style using T-hinges or clamped with mounting corners.
Squared or rectangular pieces, with details close to the edges were secured with T-hinges, and if necessary, V-hinges for extra support, in floating style mounts. In some cases, when extra support was not necessary, the tabs on the bottom were left loose.
If there was no relevant information on the edges, the items were secured in a clamp style with mounting corners. To develop an efficient corner, some practice attempts were carefully executed. Different artworks require different folds and after testing, four main styles were chosen.
This case study contains a step-by-step set of instructions to make and use the selected range of corners.
Style 1: Fixed mounting corners
Corner with a simple triangular shape that can be trimmed to better fit the items. (Kosek, 2004)
Specifications: Hasegawa Usumino Japanese paper, 3.4 monme, and gummed Japanese hinging paper (for quicker mounting, as this was for temporary display).
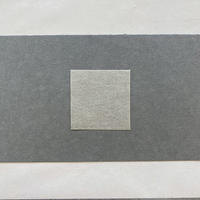
1. Start with a square piece of paper – 55x55mm
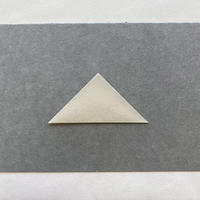
2. Fold along the diagonal to form a triangle
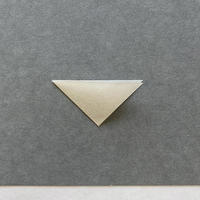
3. Open and fold again along the opposite diagonal
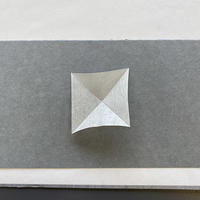
4. Unfold back to the original position
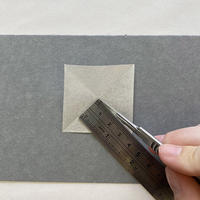
5. Using a scalpel, cut out one of the triangles
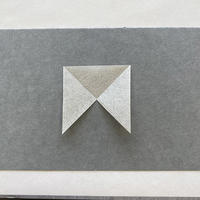
6. Final open format
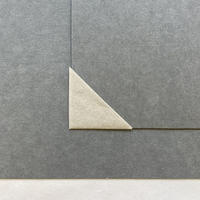
7. Fold in the sides to form a triangular pocket. Place it on the corner of the object to make sure it fits.
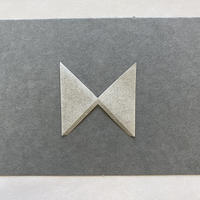
8. The corner can be left as an entire triangle or it can be cut out, leaving an edge (3mm)
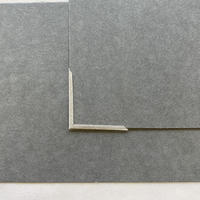
9. Final folded format

10. Final format with the artwork
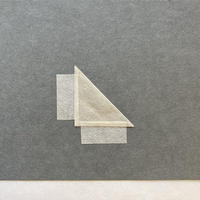
11. Fix the sides with gummed Japanese hinging paper
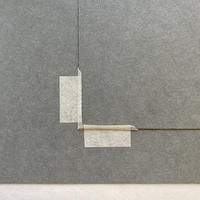
12. Final format fixed in the mount with the artwork in place
Style 2: Fixed mini-mounting corners
Smaller version of Style 1, a simple and practical way to secure smaller and lighter items.
Specifications: Hosokawa thin-medium Japanese paper and gummed Japanese hinging paper.
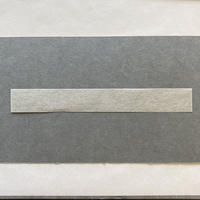
1. Start with a strip of paper – 150x20mm
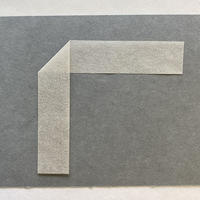
2. Near the middle, fold 90° downward
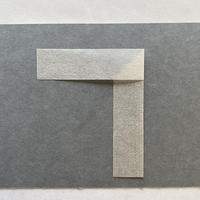
3. Fold back the horizontal tab
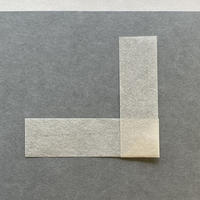
4. Fold the vertical tab upwards
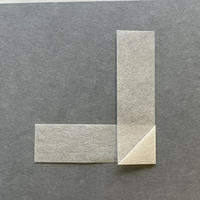
5. Flip to see the final folded format
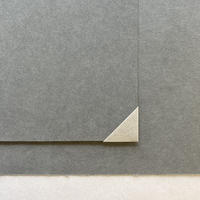
6. Final format with the artwork
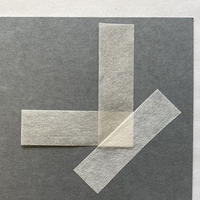
7. Fix the corner with gummed Japanese hinging paper
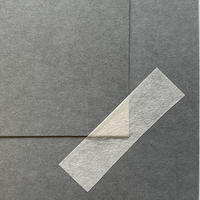
8. Final format fixed in the mount with the artwork
Style 3: Loose mounting corners – “Frog legs”
The corner can be stretched open and closed again to properly insert and remove the artwork with a motion resembling the legs of a frog.
Specifications: Hasegawa Usumino Japanese paper, 3.4 monme and gummed Japanese hinging paper
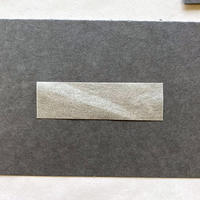
1. Start with a strip of paper – 85x25mm
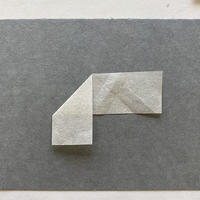
2. From the middle, fold 90° downward
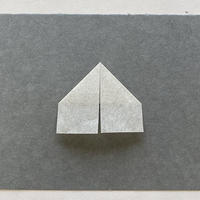
3. Repeat the fold with the other half
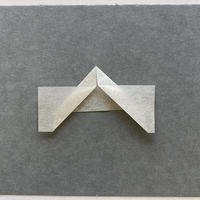
4. Fold the tabs outward, leaving a margin to hold the item
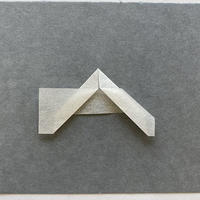
5. Cut the excess of paper on top
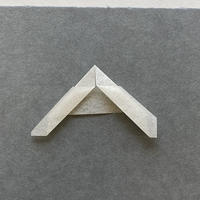
6. Also cut the excess of paper on the bottom
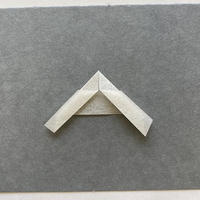
7. Final folded format
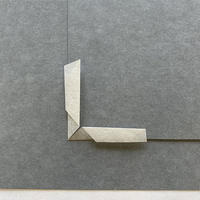
8. Final format with the artwork
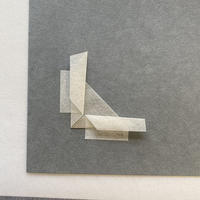
9. Fix the sides with gummed Japanese hinging paper
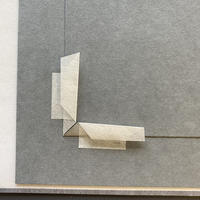
10. Final format fixed in the mount with the artwork
Style 4: Loose mini-mounting corners
The mini corners provide an overall effective hold and facilitate movement for adjustment, if necessary. Like the frog legs, they are ideal for fixing the top of artworks or to secure fragile objects.
Specifications: Hosokawa thin-medium Japanese paper and gummed Japanese hinging paper
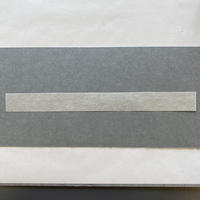
1. Start with a strip of paper – 200x200mm
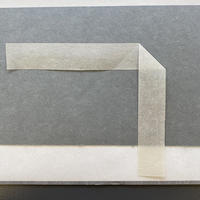
2. From the middle, fold 90° downward
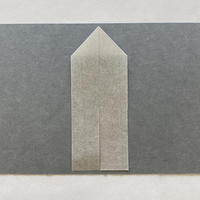
3. Repeat the fold with the other half
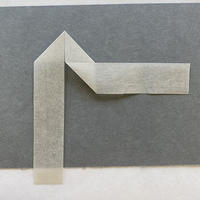
4. Fold the tabs outward, aligning them with the base of the triangle
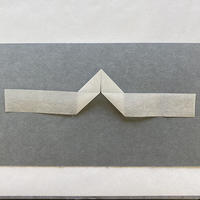
5. Repeat the fold with the other tab
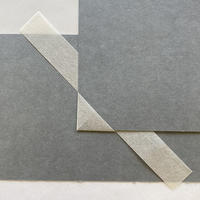
6. Final folded format, leaving the entire triangle
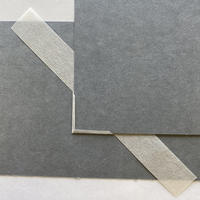
7. Final format trimmed down, leaving thin edges to hold the artwork
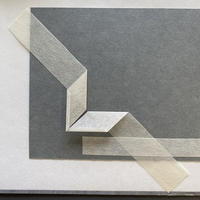
8. Fix on the sides with gummed Japanese hinging paper
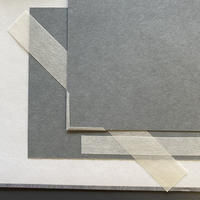
9. Final format fixed in the mount with the artwork – one side is kept loose
Notes
The size of the windows for clamping mounts are standardised to cover a 3mm margin on all sides of the object. The trimmed corners follow this template.
Styles 1 and 2 are completely fixed to the mount. Following the examination made, they provide better stability and are ideal to secure the bottom of items. Styles 3 and 4 have only half of the structure fixed to the mount. They are excellent for the top corners, which can be moved to facilitate the insertion and removal of the artwork.
In conclusion, there are many solutions for mounting a work of art on paper. Careful examination and mock ups are vital to define the best method, and the materials (type of paper and adhesive) are as imperative as the type of mounting.
This paper is intended to aid the development of simple folded corners and presents the ones we used to prepare the J.R.R. Tolkien collection for display.
List of materials
Gummed Japanese hinging paper – Hayaku Instant Japanese Hinges
Hasegawa Usumino 1.6 & 3.4 monme
Hosokawa thin-medium
Mounting board
Polyester strips
Wheat starch paste
Bibliography
Kosek, Joanna M., Conservation Mounting for Prints and Drawings: A Manual Based on Current Practice at the British Museum (Archetype Publications: London, 2004)


